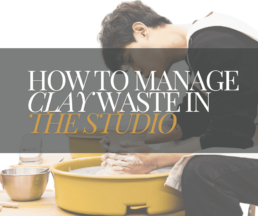
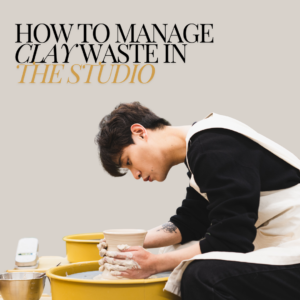
How to manage clay waste in the pottery studio.
How to manage clay waste in the pottery studio
As the demand for ceramics continues to grow, so does the need for more efficient waste management and recycling practices.
Understanding how to recycle clay and manage waste not only benefits the environment but also enhances the efficiency and profitability of ceramic production.
This blog delves into the importance, processes, and benefits of clay recycling and waste management.
As a company we have always understood the importance of our environmental responsibility.
In recent years we are now very focused on the importance of sustainability not only for future generations but the future of our industry.
It's likely you are already managing clay waste to save costs, but we want to highlight the importance of this to all of our customers with some ways to minimising their impact.
The Importance of Clay Recycling and Waste Management

Clay recycling and waste management play crucial roles in minimising the environmental impact of ceramic production.
Here’s why it is important:
- Resource Conservation: Recycling clay helps conserve natural resources by reducing the need for new raw materials. This conservation is critical as natural clay deposits are finite.
- Waste Reduction: Effective waste management reduces the amount of waste sent to landfills, which in turn decreases the environmental footprint of clay production.
- Energy Savings: Recycling clay often requires less energy than processing raw materials, leading to lower energy consumption and reduced greenhouse gas emissions.
- Cost Efficiency: Recycling and reusing clay can reduce material costs for manufacturers, enhancing the overall profitability of the production process.
Waste Management in the pottery studio
Effective waste management is as important as just focusing on recycling.
Here are some ways to manage waste in your ceramic studio:
- Minimise Waste: Using more efficient processes that can help minimise the amount of waste generated is a really good place to start. Explore improving cutting techniques and quality control, and, without culling your creativity, try using precise measurements.
- Reusing Waste Materials: When working with clay, clay waste is a given with trimmings and broken pieces. These can be reused in other stages of production. For example, clay trimmings can be rehydrated and reworked.
- Proper Disposal: For waste materials that cannot be recycled or reused, proper disposal is essential. This includes following local regulations for hazardous waste and ensuring non-recyclable waste is disposed of in an environmentally responsible manner.
- Innovative Solutions: Exploring innovative waste management solutions, such as developing new products from waste materials is a great way of saving costs and further enhancing your own studios sustainability efforts. A focus on sustainability will always be seen in a positive light by your own customers.
- Employee Training: Educating employees about waste management practices and the importance of recycling can lead to more sustainable production processes. Training programs can cover proper sorting techniques, contamination prevention, and the benefits of recycling.
The Process of clay recycling from our own pottery studio:

Recycling clay involves several steps to ensure the material can be reused effectively in production.
Here’s a breakdown of our typical clay recycling process:
- Collection and Sorting: Waste clay is collected from various sources, including production scraps, defective products, and post-consumer waste. The clay is then sorted to remove any contaminants such as glazes, pigments, or non-clay materials.
- Rehydration: The cleaned clay particles are mixed with water to create a workable consistency. This step may require several cycles of mixing and resting to ensure the clay rehydrates evenly.
- Cleaning and Grinding: The sorted clay is cleaned to remove impurities. This often involves passing the clay through sieves and magnets to facilitate further processing.
- Blending: The recycled clay is then mixed with virgin material to ensure the properties of the body meet our strict criteria and recipe measurements.
- Pugging and De-Airing: The rehydrated clay is passed through a pug mill, which homogenises the material and removes any trapped air. This step is crucial for ensuring the quality and workability of the recycled clay.
- Quality Testing: The recycled clay is tested to ensure it meets the necessary quality standards for production. This involves checking for consistency, plasticity, and other physical properties.
- Reuse in Production: Once the recycled clay meets the required standards, it is reintroduced into the production or sales process. It can be used to create new clay products, reducing the need for fresh raw materials.
Benefits of Clay Recycling and Waste Management

The benefits of effective clay recycling and waste management are vast:
- Environmental Protection: Reducing waste and conserving resources help protect natural ecosystems and reduce the environmental impact of clay production.
- Economic Savings: Recycling and reusing materials can lead to significant cost savings in raw material procurement and waste disposal.
- Sustainable Production: Adopting sustainable practices can enhance a company’s reputation and appeal to environmentally conscious consumers.
- Regulatory Compliance: Effective waste management ensures compliance with environmental regulations, reducing the risk of fines and legal issues.
- Innovation and Growth: Embracing recycling and waste management can drive innovation, leading to the development of new products and more efficient production techniques.
By understanding and implementing effective recycling processes and waste management we can all do our part to minimise our environmental impact, reduce costs, and contribute to a more sustainable future.
As the industry continues to evolve, embracing these practices will be crucial for maintaining the balance between production needs and environmental responsibility.

The Art and Science of Glazing Pottery
The Art and Science of Glazing Pottery
Pottery has long been a canvas for artistic expression, and one of the most transformative steps in the process is glazing. Glazing not only enhances the aesthetic appeal of pottery but also adds a layer of functionality by making the piece water-resistant and more durable which is something to be considered when creating tableware and decorative vases.
In this blog, we'll explore the fascinating world of pottery glazing, from its history and techniques to the artistic possibilities it offers.
What is Glazing?
Glazing is the application of a glassy coating to pottery, which, when fired, fuses to the surface, creating a smooth, often colourful finish. This process involves several steps:
- Preparation of the Pottery:
Before glazing, the pottery must be bisque-fired, a preliminary firing that hardens the clay and makes it more durable. - Application of the Glaze:
Glaze can be applied in various ways, including dipping, brushing, spraying, and pouring. - Firing:
The glazed pottery is then fired again, at temperatures ranging from (1000°C to 1400°C), depending on the glaze used.
Glazes are made up of three main components:
- Silica:
The glass former. - Fluxes:
Which lower the melting point of the silica. - Alumina:
Which stabilises the glaze and prevents it from running off the pottery during firing.
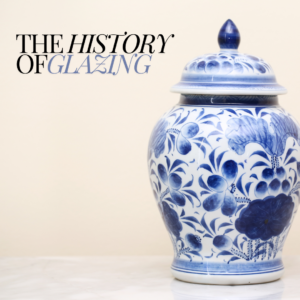
The History of Glazing
The art of glazing dates back thousands of years. The earliest known glazes were developed in Mesopotamia around 1500 BCE, using simple materials like ash and sand. Over time, glazing techniques evolved, leading to the sophisticated and intricate designs seen in ancient Chinese, Islamic, and European pottery.
Each culture developed unique glazing methods, reflecting their artistic sensibilities and available materials. For example:
- Chinese Pottery:
Known for their celadon and porcelain glazes, the Chinese perfected high-temperature glazes that produced rich, translucent colours. - Islamic Pottery:
Renowned for its intricate patterns and metallic glazes, Islamic pottery often features vibrant blues and greens. - European Pottery:
European potters developed tin-glazed earthenware, such as maiolica and faience, characterized by their opaque, white glazes that serve as a canvas for detailed painting.
Types of Glazes
The type of glaze used can dramatically affect the appearance and characteristics of the finished pottery. Here are some common types:
1. Glossy Glazes:
Glossy glazes are characterized by their shiny, reflective surface. They are often used to create a smooth, glass-like finish that enhances the colours and patterns on the pottery. These glazes are popular for functional ware, like plates and bowls, due to their easy-to-clean surface.
2. Matte Glazes:
Matte glazes offer a soft, non-reflective finish that gives pottery a more subdued and sophisticated look. They are often used for decorative pieces and add a tactile quality to the pottery, making it pleasant to touch and hold.
3. Satin Glazes:
Satin glazes fall somewhere between glossy and matte, providing a smooth surface with a subtle sheen. They offer a balanced look that is neither too shiny nor too dull, making them versatile for various pottery styles.
4. Textured Glazes:
Textured glazes, such as crystalline or crackle glazes, create unique surface effects that add depth and interest to the pottery. Crystalline glazes, for instance, produce patterns of crystal growth, while crackle glazes create fine, deliberate cracks in the surface.
5. Specialty Glazes:
Specialty glazes, like raku or luster glazes, are used for specific effects and require unique firing techniques. Raku glazes, for example, are part of a rapid cooling process that results in distinctive metallic or crackled finishes.

Techniques for Applying Glaze
The method of glaze application can significantly influence the final look of the pottery. Here are some common techniques:
1. Dipping:
Dipping involves immersing the pottery into a container of glaze, ensuring an even coat. This method is quick and effective for achieving uniform coverage, making it ideal for larger pieces.
2. Brushing:
Brushing allows for more control and precision, making it suitable for applying multiple layers or intricate designs. It's often used for smaller pieces or to add decorative touches.
3. Spraying:
Spraying glaze with an airbrush or spray gun provides an even coat and is especially useful for achieving gradients or blending colours. This technique is commonly used for larger pieces and for creating smooth transitions between glazes.
4. Pouring:
Pouring involves pouring glaze over the pottery, allowing it to flow and create organic patterns. This method is great for achieving spontaneous, unique designs and is often used in combination with other techniques.
The Firing Process
Firing is a crucial step in the glazing process, as it transforms the applied glaze into a glassy, durable coating. The firing temperature and atmosphere play a significant role in the final appearance of the glaze. There are two main types of kilns used in the firing process:
1. Electric Kilns:
Electric kilns provide precise temperature control, making them ideal for achieving consistent results. They are commonly used for firing low and mid-fire glazes.
2. Gas Kilns:
Gas kilns allow for reduction firing, a process that reduces the amount of oxygen in the kiln. This can produce unique effects, such as the rich, deep colours seen in high-fire glazes and reduction glazes.
The Artistic Possibilities of Glazing
Glazing offers endless artistic possibilities, allowing potters to experiment with colours, textures, and techniques to create unique, expressive pieces. Here are some ways glazing enhances the artistic value of pottery:
1. Colour and Design:
Glazes can be mixed and layered to create a vast range of colours and patterns. Artists can use various techniques, such as wax resist or sgraffito, to create intricate designs and details.
2. Surface Texture:
The choice of glaze and application technique can add texture and depth to pottery. From smooth, glossy finishes to rough, textured surfaces, glazes can significantly alter the tactile quality of a piece.
3. Visual Effects:
Specialty glazes can produce stunning visual effects, such as the metallic sheen of luster glazes or the intricate patterns of crystalline glazes. These effects can make each piece of pottery a unique work of art.
Conclusion
Glazing is a vital part of the pottery-making process, transforming simple clay forms into beautiful, functional pieces of art. With a deep history and a range of techniques and materials available, glazing offers endless possibilities for creativity and expression. Whether you're a seasoned potter or just starting out, experimenting with glazes can open up new avenues for artistic exploration and help you create truly unique and stunning pottery.
So, next time you admire a piece of glazed pottery, take a moment to appreciate the intricate processes and artistic vision that went into creating it. Glazing is where science meets art, and the results are nothing short of magical.

How to store clay effectively
We all know how frustrating it can be when our precious clay dries out or gets all gunky, right?
Keeping your clay in top-notch condition isn’t just about saving your projects; it’s also about saving some cash!
With prices going up on just about everything lately, who wouldn’t want to save a little here and there?
So, let’s chat about some easy and practical tips for storing your clay.
Trust us, these simple steps can help you maintain its perfect consistency, keep it from drying out, and avoid any unwanted contaminants....

- Wrap in Plastic
Wrap the clay tightly in plastic bags to prevent it from drying out. Make sure the bags are sealed well.
For smaller pieces or to provide an additional layer of protection, wrap the clay in plastic wrap before placing it in the plastic bag
...........
- Use Airtight Containers
Store the wrapped clay in airtight containers to further protect it from air exposure.
Use Tupperware or similar airtight containers to keep the clay soft and moist.
...........
- Moisten the Clay
Place a damp cloth or paper towel inside the bag or container with the clay to maintain humidity.
Be careful not to make it too wet to avoid dissolving the clay.
Occasionally mist the clay with water if it starts to dry out, but avoid over-watering.
...........
- Store in a Cool, Dark Place
Keep the clay in a cool, dark place to prevent it from drying out or hardening due to heat and sunlight.
...........
- Label and Date
Label the bags or containers with the type of clay and the date it was stored. This helps in managing inventory and using older clay first.
........... - Rehydrate Dry Clay
If the clay starts to dry out, you can rehydrate it by breaking it into small pieces, placing them in a bag or container with water, and letting it sit until the clay absorbs the water and becomes pliable again.
........... - Long-Term Storage
For long-term storage, consider using a clay humidor, which is designed to maintain the optimal humidity levels for clay storage.
By following these tips, you can keep your clay in good condition and ready for use whenever you need it.

Why you shouldn’t subject clay to freezing conditions (both in and outdoors)
Storing clay in freezing conditions can negatively impact its quality and usability for several reasons:
- Water Expansion
- Freezing Water
Clay contains water, which expands when it freezes.
This expansion can create internal stresses within the clay structure, leading to cracks or breaks. - Structural Damage:
The repeated freeze-thaw cycles can cause significant damage to the clay, making it weak and crumbly.
...........
- Texture Changes
- Altered Consistency:
Freezing can change the texture of the clay, making it less smooth and more difficult to work with. - Loss of Plasticity:
The clay may lose its plasticity and become harder to mold, making it less suitable for detailed work or fine adjustments.
...........
- Separation of Components
- Component Separation:
The freezing and thawing process can cause the different components of the clay to separate.
This separation can affect the uniformity of the clay, leading to an inconsistent texture and workability.
...........
- Difficulty in Rehydration
- Uneven Moisture:
Thawing frozen clay can result in uneven moisture distribution, where some parts might be too wet while others remain dry.
........... - Rehydration Issues:
It can be challenging to rehydrate and homogenize clay that has been frozen, which can impact its performance in various applications.
...........
- Chemical Changes
- Chemical Reactions:
Prolonged exposure to freezing temperatures might alter the chemical composition of some types of clay.
This can affecting their colour, firing properties, and overall behaviour during the ceramic process.
Practical Implications
- Storage Conditions:
To avoid these issues, it's best to store clay in a temperature-controlled environment, ideally at room temperature, or slightly cooler but well above freezing. - Monitoring Environment:
Regularly check the storage conditions to ensure that the clay is kept in a stable environment, free from extreme temperature fluctuations.
By avoiding freezing conditions, you can ensure that your clay remains in optimal condition, maintaining its plasticity, consistency, and workability for all your projects.
So, go ahead and give these tips a try!
Your clay (and your wallet) will be in much better shape, and you’ll be all set for creativity! 🌟🧑🎨